Football Offensive Line Drills: A Complete Guide For Any Level
Reading Time: 31 minutes


Reading Time: 31 minutes
Football offensive line drills build the foundation for a technically sound, detail-oriented unit that dominates the trenches on game day. Whether it’s creating time for the quarterback in pass protection or opening lanes for backs on running plays, offensive linemen can be the difference between winning and losing.
Preparing your athletes for the physicality and discipline required to compete at the highest level takes a strategic practice regimen with fundamental drills. Offensive line covers a range of situations, concepts, technique, and positions, and a complete drill regimen should be well-rounded.
This guide covers a wide range of offensive line drills that build proper stance, hand placement, run blocking, and pass protection at every level. Additionally, it provides insight on how to script them into a practice week.
Whether you’re figuring out how to coach football offensive line, a player looking for independent work, or just in need of some fresh drills, continue reading to learn useful offensive line drills to incorporate into your practice rotation.
What Are Football Offensive Line Drills?
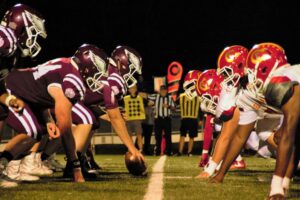
Courtesy of Muyuan Ma on Unsplash
Football offensive line drills are the structured reps and exercises coaches use to teach offensive linemen the fundamental skills, technique, footwork, and communication required for any position on the line.
While it’s true that size and strength matters on the offensive line, that doesn’t guarantee success in performance. Players who have better leverage, faster hands, cleaner footwork, and tighter fundamentals are more likely to help the team and play well on game day.
Offensive line drills often take place during the individual periods, known as INDY, of a complete football practice plan. In younger, less-structured practices, offensive line drills happen during position-specific work or stations. In either case, offensive linemen work closely with position coaches and teammates to develop and improve the fundamentals that lead teams to dominate the line of scrimmage.
We’ll discuss it throughout this resource, but offensive line drills cover the complete spectrum of skills and abilities required to succeed at any position in the group. From individual blocking technique through run and pass-specific footwork and timing, your team’s offensive line drills should aim to help players develop a well-rounded foundational skillset.
Why Are Offensive Line Drills Important in Football?
Offensive line drills are important because they prepare players for the battle in the trenches, which is often where the outcome of an American football game is decided. In a sense, linemen are the most important players on either side of the ball.
While that’s an exaggerated statement, and no one play or unit determines the entire outcome of a game, the offensive line serves more importance than the average viewer or young player recognizes. The best quarterback, running backs, and wide receivers can’t do anything without a reliable offensive line to protect them and open up running lanes.
Some of the reasons why offensive line drills are so important include that repeated practice:
- Builds fundamental muscle memory and footwork required to protect the quarterback and open running lanes
- Helps players react instinctively during fast-paced plays
- Builds proper body position, hand placement, pad level, and leverage for efficient movement against defenders
- Optimizes blocking technique and decision-making under pressure
- Builds unspoken timing required to pass off stunts, execute combo blocks, and protect the quarterback
- Enhances performance by emphasizing stance, first steps, hand placement, footwork, and finishing blocks
Offensive Line Basics
Improving an offensive line, or an offensive lineman, requires mastering leverage, footwork, hand placement, and coordination. While the road to mastery is a long one, it starts at the very beginning: the basics.
For offensive linemen in American football, there are two core categories of basics that we’ll cover in this resource:
- Stance
- Positioning
Stance
An offensive lineman’s stance is the position they come set in before the snap on the line of scrimmage. A proper stance provides explosive movement for offensive linemen, allowing them to get their hands up and punch the defender quickly. We’ll get to specific types in a moment, but proper posture is crucial for any effective blocking techniques.
There are a couple core components that go for (almost) any and every offensive line stance, including:
- Maintain a wide base and low center of gravity
- Feet should be slightly wider than shoulder-width apart
- Keep weight on the balls of the foot, or on the instep
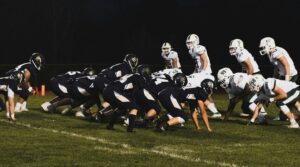
Courtesy of Desiray Green on Unsplash
There are two main types of stances for offensive linemen:
| Type | Description | Use Case |
| Two-point stance |
|
|
| Three-point stance |
|
|
A three-point stance is essential for offensive linemen, while many like to equip themselves with both a reputable two-point and three-point stance.
Positioning
We could go into an entirely different piece about offensive line positioning and technique and other jargon, but we’ll keep it simple here.
There are a couple components of positioning in offensive line play and blocking to consider, including:
- Hand carriage and placement: Where the player carries their hands depends on the specific assignment, but elbows are always tucked tight with hands inside and fingertips pointed to the sky.
- Low center of gravity: A low, wide base creates a wide center of gravity. Consistently maintaining a low center of gravity requires immense core and leg endurance, but is extremely beneficial in offensive line play.
- Balance: Remaining on balance is crucial for offensive linemen to avoid being pushed off-balance or bull-rushed.
- Punch strength and accuracy: Offensive linemen want to land as powerful and accurate of a punch as possible with as short an arm motion as possible. They want their first contact to always come in explosive strikes, with proper hand placement.
Essential equipment checklist for offensive line drills
You don’t need a ton of equipment to run effective, impactful offensive line drills. Especially at the earliest levels of play, it’s more important to drill fundamentals without incorporating any equipment.
To complete all of the football drills in this resource, and most competitive offensive line stations, you’ll need:
- A blocking sled
- Blocking bags
- Hand blocking shields
- Cones
- Ladders
- Hurdles
- Spray paint or yard parkers
What Are The Different Types of Offensive Line Drills and Techniques?
This guide walks through four buckets main buckets of offensive line drills and techniques:
- Warm-up and mobility work
- Fundamental stance-and-hands drills
- Run blocking, and
- Rass protection.
Through these four buckets of drills, offensive line coaches establish athleticism, develop footwork, lock in technique, and create cohesive units. Not many of these drills are everyday drills, and you’ll want to mix and match with the time you have.
As long as you remain committed to consistency with some type of drills, you’ll be on the right path. Let’s dive in.
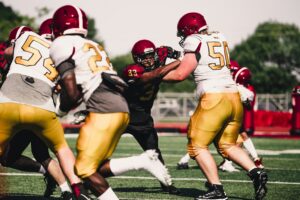
Image courtesy of Alora Griffiths on Unsplash
Warm-Up Line Drills And Mobility
Warm-ups are the foundation of any practice regimen, and offensive line drills are no different. In this resource, we’ll lean on a small rotation of movements that transfer to the line.
Dynamic warm-up sequence:
- Bird-dog steps: activates the hips and core.
- Band walks: lateral steps with a resistance band around the knees to fire the glutes
- High knees through bags: quick feet through five bags, focused on knee height and arm drive
- Short-area sprints: ten-yard bursts to raise heart rate and prepare the legs for contact
- Lateral shuffles: light lateral movement to prime balance before drills begin
For a deeper library of movement prep, the football conditioning drills guide breaks down different exercises with sets and reps. But let’s take a look at each of these at with a closer lense.
Bird-dog steps
- Gather all offensive linemen in a line, with a couple yards of space between one another
- Get players into set position
- Have a coach whistle or call the snap count, and all offensive linemen are to take a step on that sound
- Complete the following progression of steps with each foot (right and then left). Players must return back to set position in between each step:
- Forward
- 45 degrees
- Lateral
- Drop step
- Complete the bird dog step progression 4-5 times with each foot
Band walks
- Have offensive linemen break into groups, depending on how many resistance bands you have (each group shares a band)
- Instruct the players completing the drill to position the resistance band around the knees and/or ankles, depending on preference and stretch
- Emphasize a low, athletic position while maintaining a challenging tension on the band and moving with a controlled-yet-purposeful urgency
- Complete the following progression of band walk:
- Lateral steps (both sides)
- Forward steps
- Backward steps
- Forward 45 degree angled steps
- Backward 45 degree angled steps
- Rotate through each player for any given step before moving on to the next in the progression
High knees through bags
- Align 5 cylindrical bags in a straight line (you can also use hurdles or any other object)
- Instruct offensive linemen to bring their knee up to waist-height or higher and rip with their arms for additional power
- Have each offensive lineman run through the bags with high-knees and quick feet
- Place a coach at the other end of the bags to hold up a certain number of fingers that players must call out upon command (this is an optional step to ensure players keep their heads up and eyes looking forward)
- Upon planting their first foot after clearing the bags, players should explode into a sprint upfield
- The number of repetitions for this drill depends on the specific circumstances (practice vs. pre-game, pre-season vs. playoffs, etc.)
Short-area sprints
- Gather all offensive linemen in a line, with a couple yards of space between one another
- Place two cones 10 yards apart: one as a starting point and one as the finish line
- Have all linemen get into set position at the starting point (or one at a time in small groups)
- Upon a coach’s whistle or snap count, players are to explode out of their stance into a full-speed sprint through the finish line
- Repeat as many times as the specific circumstance calls for
Lateral shuffles
- Line up offensive players in groups of four, with plenty of space between everyone and in an wide open area of the practice facility
- Have offensive linemen get into two-point stances, simulating the proper position for pass protection
- On a coach’s whistle, offensive linemen shuffle at a gentle pace to the left
- When the coach blows the whistle, linemen switch direction without crossing their feet over and shuffle to the right
- Players continue changing direction on the coach’s whistle
- The coach’s double whistle indicates a rest, or the end of the exercise
Fundamental Offensive Line Drills

As we get into actual drills, it makes sense to start with the fundamentals that set the foundation of any linemen’s trajectory and any offensive line’s chances. Some of the most important qualities are develop and drilled in this section, including:
- A solid stance
- Clean first step technique
- Disciplined hands
- Proper posture
- Low hips
- Flat back
In the sections below, we’ll break down some fundamental offensive line drills for football coaches and players, including:
- Stance-to-Step Drill
- Tennis Ball Drills
- Set and Punch Drill
- Three Punch Drill
- Fit and Finish
Stance-to-Step Drill
The stance-to-step drill (or stance-to-start drill) is a basic offensive line drill where players rep the motion from their pre-set position to their first step, pausing for checkpoints of evaluation.
Here’s how the stance-to-step drill works:
- Gather players side-by-side in a line, with a few yards of space between each and all players facing a nearby coach
- Have players begin in their pre-set position, emphasizing a wide base for stability
- Upon the coaches whistle or command, players move into their stance
- The coach (and other nearby coaches) evaluates each player’s form before moving on to the next step
- After approving all players’ stances, the coach once again blows the whistle or yells a command
- Players take their first pick up step and hold that position
- Coaches evaluate the held pick up step position, with the drill concluding upon approval of all players’ positioning
Benefits of the Stance-to-Step Drill
The stance-to-step drill is a multi-faceted drill that benefits offensive linemen in two major ways:
- The drill won’t begin until they’re set in what you deem as proper stance, so those core basic offensive line stances, techniques, and fundamentals discussed earlier are drilled in, evaluated, corrected, and perfected
- Just as it won’t begin, the drill cannot conclude until you assess and approve each player’s positioning after the pick up step. This forces the precise execution and attention-to-detail of a balanced first step with proper hand and pad positioning into muscle memory
Tennis Ball Drills
Tennis ball drills describe a set of offensive line drills that utilize a tennis ball to improve hand-eye coordination and lateral movement, specifically useful traits for pass protection.
We’re going to focus on two different tennis ball drills that build on each other: tennis ball ground rolls and pass protection tennis ball swats.
Tennis Ball Ground Rolls
The tennis ball ground rolls offensive line drill involves rolling a tennis ball on the ground while shuffling in a low, athletic stance. It’s a simple drill progression offensive linemen can do independently or in a large group setting, requiring only a tennis ball.
There are two parts to the tennis ball ground rolls drill: downfield shuffles and lateral shuffles.
- Downfield shuffles build muscle memory for maintaining a low stance and center of gravity while moving downfield in run-blocking. Simultaneously, they train players’ brains to multitask and work hand-eye coordination by rolling the tennis ball laterally while physically shuffling downfield.
- Lateral shuffles further train hand-eye coordination while building muscle memory for the lateral footwork and lower-body positioning required in pass protection.
Tennis Ball Ground Roll Downfield Shuffles:
- Line players up with the space you have, making sure each offensive lineman has enough room around them to move without disrupting others around them
- Designate a starting line and an end line, however far apart you prefer
- Instruct players to set the tennis ball on the ground, in between their legs about a yard in front of their feet, at the starting line
- Have your offensive linemen squat into a low, athletic position with a wide base, straight back, head up, and arms dangling to the ground with palms facing the outermost lateral edges of the tennis ball
- On the coach’s whistle, players shuffle forward downfield (one foot at a time) toward the end line while rolling the tennis ball laterally back and forth between hands
- As players move, have them focus on keeping their head up and eyes forward
- When players reach the end, you can either turn around and have them return to their original starting point or consider the drill complete
Tennis Ball Ground Roll Lateral Shuffles:
- Line players up with the space you have, making sure each offensive lineman has enough space (specifically lateral space) around them to move without disrupting others
- Instruct players to set the tennis ball on the ground, in between their legs about a yard in front of their feet
- Have offensive linemen squat into a low, athletic position with a wide base, straight back, head up, eyes forward, and one arm dangling to the tennis ball while the other remains flexed in simulated protection
- On the coach’s whistle, linemen shuffle laterally away from the side of their dangling arm while maintaining a steady base, keeping their head up and eyes forward, and tapping the ball along with the dangling hand
- Continue until reaching a stopping point or a coach’s whistle, and switch to shuffling the opposite direction
- The drill is complete upon shuffling in each direction. Repeat as many times as you prefer.
Benefits of Tennis Ball Ground Rolls
This offensive line drill provides numerous fundamental benefits, including:
- Drilling hand-eye coordination and both downfield and lateral movement
- Stretching and strengthening the lower half, building core and leg endurance
- Ingraining a low, athletic stance as second-nature muscle memory through consistent, repeated emphasis on the positioning
Pass Protection Tennis Ball Swats
Pass protection tennis ball swats is a drill where offensive linemen simulate pass protection while swatting tennis balls tossed by a coach acting as a defender.
In this drill, offensive linemen shuffle diagonally backwards in a zig zag pattern, using precise footwork to plant and open their hips every time they change direction, all while concentrating on tracking and striking the tennis ball.
Here’s a step-by-step breakdown of the pass protection tennis ball swats drill:
- Have an offensive lineman line up in a staggered two-point stance directly across from a coach holding a tennis ball
- On the coach’s whistle or snap count, the lineman steps back with their staggered leg
- As the lineman shuffles backward in pass protection at about a 45 degree angle, the coach flips a tennis ball at their chest every 2-3 shuffles
- The lineman should swat the tennis ball away using the arm to the side that they’re shuffling with a flat, open hand
- Immediately upon swatting the tennis ball, the lineman should plant their outside foot, shift their stance to an opposite stagger, and shuffle the opposite direction at about a 45 degree angle backwards
- With every 2-3 shuffles that the coach throws the tennis ball, the offensive shifts direction (ex. Start shuffling back left for 3 shuffles, swat tennis ball, plant and shuffle back right for 3 shuffles, swat tennis ball, etc.)
- Continue this drill as long as you see fit
Benefits of Pass Protection Tennis Ball Swats:
This offensive line drill offers several benefits to players of all ages and skill levels, including:
- Focused repetitions of pass protection footwork for precision and quickness with one-on-one analysis from a coach or partner
- Improving posture and technique, as linemen have to hold a strong stance throughout the duration of the drill and accurately strike with the hands to contact the ball
- Developing focus and timing by combining hand-eye coordination and change of direction in the same sequence (swat, plant, pivot, repeat).
Set and Punch Drill
The set and punch drill involves repeating the motion between an offensive lineman’s set stance and their initial contact point, with coaches or partners holding blocking shields to simulate defenders. At its core, the set and punch drill teaches offensive linemen to deliver powerful blocks using speed and explosion off the line of scrimmage (LOS).
Here’s how the set and punch drill works step-by-step:
- Gather offensive linemen in small groups, pairing each group with a coach holding a blocking shield
- Have one lineman in each group step up to go at a time
- Participating linemen should set a wide base, squat into a low and athletic position, double check foot alignment, and then place their hand to the ground for their final three-point stance
- On the coaches whistle or snap count, linemen should explode out of their stance and kick slide toward the blocking shield
- Simultaneously, linemen should snap their upper body to pass protection posture and find the target with their eyes
- Linemen finish their motion by delivering a powerful strike to the block shield, with their elbows tucked in and thumbs up
- Repeat the drill as many times as you’d like, making sure everyone in each group gets a turn before re-cycling through
Benefits of the Set and Punch Drill
This offensive line drill benefits player technique and performance in several ways, including:
- Instilling pinpoint attention-to-detail in your linemen by pausing to check alignment at the initial squat, before placing the hand down into their final stance
- Repeating crucial fundamental pass blocking technique by hyperfocusing on the initial steps and first impact
- Creating muscle memory for explosive bursts and violent, accurate strikes to the defenders chest by repping the movements consistently and correcting any visible errors to form
Three-Punch Drill
The three punch drill involves an offensive lineman striking (or “punching”) a simulated defender three times and anchoring a bull rush on the third repetition. Simulated defenders hold blocking bags and both players reset in between each repetition.
The three punch drill is a complete pass protection drill that works numerous points of focus in technique and form, providing a holistic rep from stance through contact.
Here’s how to complete the three punch drill step-by-step:
- Line up two cones about 3-5 yards apart as the “line of scrimmage” for the drill
- Pair up offensive linemen into partners
- One player takes the role of offensive lineman, the other holds a blocking bag as a simulated defender
- The offensive lineman gets in a three-point stance in between the cones, facing their partner/defender who holds a blocking bag on other side of the cones
- On the coaches whistle or snap count, the offensive lineman explodes to the defender with an emphasis on getting their hands up and in a good position immediately
- Meanwhile, the defender moves toward the offensive lineman on the snap count
- The offensive lineman strikes the simulated defender’s blocking bag with their hands as initial contact, with three main focus or coaching points:
- Keeping the elbows tight, hands inside, and fingers and thumbs pointed to the sky
- Engaging power angles and punching from the triceps
- Striking with the proper timing of the punch
- After striking, the offensive lineman resets their feet while keeping the hands up and in position
- Once their feet are reset, the offensive lineman strikes the simulated defender’s blocking bag a second time
- Again, the offensive lineman resets their feet and prepares for the third “punch” or strike
- The offensive lineman, after resetting their feet, again strikes the defender’s blocking bag with a third punch
- On the third and final “punch”, the partner playing defender should simulate a bull rush with the blocking bag and continue driving their feet upon contact with the offensive lineman
- As the simulated defender “bull rushes” with the blocking bag, the offensive lineman anchors down with all the weight on their insteps
Benefits of the Three-Punch Drill
This offensive line drill helps players develop multiple important pass protection skills, including that it:
- Strengthens hand placement against bull rushes specifically, and in general, by focusing on getting the hands up as soon as the linemen get out of their stance
- Improves hand carriage technique by repping the motion over and over
- Develops speed and explosiveness out of a 3-point stance
- Builds strength in anchoring against violent defensive pass rushers and bull rushes
- Teaches how to anchor when striking the defender by working the upper and lower body on the third “punch” or strike
- Locks in timing on hand punches/strikes by providing three hyperfocused repetitions within one full drill rep
Fit and Finish Combination drill
The fit and finish combination incorporates all of the individual skills and fundamental technique involved in blocking into a single offensive line drill. Offensive linemen start in a three-point stance, explode off the line on a coach’s command, engage and maintain their block, drive through the defender, and finish up with their hips.
The fit and finish drive combines footwork with proper hand positioning, emphasizing a strong drive and finish. It teaches linemen and builds muscle memory for a smooth yet powerful blocking motion. The drill combines stance, first step, and hand placement into a continuous rep while finishing every block by driving the defender off the original line of scrimmage.
To incorporate the fit and finish drive into your practice plan, follow these steps:
- Pair offensive linemen into partners or small groups
- Designate one player as the offensive lineman and one as a simulated defender holding a blocking bag
- Instruct the offensive lineman and simulated defender to face each other
- Have the offensive lineman get down in a three-point stance, with the simulated defender in an athletic position across from them
- Upon the coach’s whistle or snap count, the offensive lineman explodes off the line with proper footwork and gets their head and hands in good position as they strike the simulated defender’s blocking bag
- The offensive lineman should drive as they maintain the block, finishing through with their hips
Benefits of the Fit and Finish Combination Drill
This offensive line drill benefits players and coaches by drilling multiple facets of offensive line technique, including:
- Continued emphasis on a proper three-point stance by beginning every rep in set position, with a coach evaluating before starting the drill
- Developing explosiveness off the line in the quick burst from set to get the hat and hands in good position for striking the defender
- Instructing players on proper hat and hand placement, emphasizing those keys every repetition and correcting players when they’re out of position
- Building strength and accuracy in striking and controlling defenders by making strong, impactful punches, maintaining leverage, and driving their lower half upon impact
- Finishing through for a complete block by using their hips
Most of these reps need pads, sleds, or a partner bag, so check the football training equipment guide before building an offensive line drill station rotation.
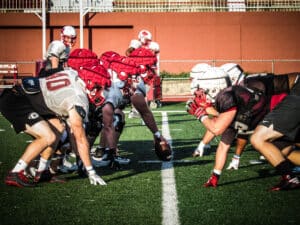
Run Blocking Line Drills
Run blocking drills simulate motions and technique require to execute the man, gap, and zone schemes called on game day.
Zone blocking step drills
Zone steps train linemen to take a lateral first step in the called direction, shoulders square, reading the defender before committing to a block.
- Inside zone step drill
- Inside zone blocking sleds
- Outside zone blocking drill
Inside zone step drill
The inside zone step drill focuses on lateral movement and timing by isolating an offensive lineman’s stance-to-step weight transfer and initial footwork on an inside zone assignment. Starting from one knee, offensive linemen drive out laterally into their first step then forward to finish a simulated blocking rep.
This offensive line drill isolates the first steps of an inside zone blocking assignment, focusing on the technique for driving out of the backside hip. By taking the strong side out of play, it forces offensive linemen to drive out of their stance and into their first lateral step through weak side power alone.
How to run the inside zone step drill:
- Have offensive linemen stand next to each other in a straight line, with enough space between each other to comfortably move and complete the drill
- Instruct offensive linemen to get down on one knee, with their strong side knee on the ground
- Zone left = left knee down
- Zone right = right knee down
- Positioned on their strong side knee, offensive linemen should get in a relaxed but upright position with their hands resting together in a way that forms a triangle and palms to the ground
- On the coach’s whistle or snap count, offensive linemen should drive off their weak side foot and hip by forcing their weight through the ground
- Through the previous step’s weight transfer, linemen should pop off their strong side knee and directly into (through an explosively smooth motion) the lateral first step of an inside zone blocking assignment
- Coaching tip: During the weight transfer into lateral step process, emphasize the importance keeping the hands in good position
- Upon the first lateral step, linemen should aim for a position where their nose aligns with the neck of the hypothetical man they’re supposed to block (this takes some imagination)
- Linemen should make a quick second step with their back side foot, planting and beginning the downfield drive
- To complete the drill, linemen should finish their downfield lateral drive by maintaining a wide base, staying in an athletic position, and shuffling downfield on their toes
Benefits of the Inside Zone Step Drill:
This offensive line drill helps players improve at understanding and executing inside zone assignments in numerous ways, including:
- Isolating the first-step weight transfer by starting linemen on their strong side knee and forcing them to explode off the weak side
- Maximizing lateral movement on the initial step by instructing linemen to exaggerate the direction of their weight transfer
- Speeding up footwork by honing in on a quick second step
- Maintaining position and leverage to execute the block by setting a hypothetical target head alignment, emphasizing proper hand positioning throughout, and keeping a wide, athletic blocking stance throughout
- Drilling proper technique for the crucial first steps of an inside zone blocking assignment into muscle memory through focused and detail oriented repetitions, evaluating and correcting mistakes on the spot, exaggerating weak-side weight transfer and lateral movement, and finishing through the blocking motion
Inside zone sleds blocking drill
The inside zone sleds blocking drill involves a group of offensive linemen practicing proper technique for inside zone assignments out of a three-point stance against a blocking sled as simulated defenders. Linemen get into their three-point stance and, upon a coach’s whistle or snap count, explode out on their first step, shift their weight downfield, shoot their hands to punch and engage the dummy, drive the lower half, and finish through a simulated block.
Optimally, this drill works best with a group of five offensive linemen with a 5-man blocking sled. Not all programs have access to that, so work with whatever you have. It can also be completed individually or using blocking bags with partners/coaches holding.
Here’s how to complete the inside zone sleds blocking drill step-by-step:
- Have five players line up in a simulated offensive line facing the blocking sled
- Make sure your offensive linemen are positioned offset to the weak side of their respective blocking dummies, so they’re in a position to execute their block following a lateral step
- Instruct offensive linemen to get down in a proper three-point stance
- On the coach’s whistle or snap call, linemen should take their first step focusing on these keys:
- Pick up the strong side foot as the initial movement to open the first step (toward the sideline)
- Drive out of the 3-point stance from the weak side, loading weight on the hip and laterally shifting it by forcing the foot “through the ground” or pushing off the ground explosively
- Maintain a low, athletic stance with proper hand position, head up, and eyes forward while moving
- Put the foot on the ground to complete the first, lateral step
- When their first step lands, linemen should set their hips and “stomping the ground” to transfer their weight downfield for the second step, or power step
- Linemen take their power step downfield, getting it to the ground as quick as possible after the first step lands, with their weak side foot
- Players shoot their hands, strike, and engage their block, simultaneous as their power step
- The offensive linemen complete the drill by extending their arms, driving their legs, and finishing high through the block
Benefits of the Inside Zone Sleds Blocking Drill:
This offensive line drill strengthens players technique and execution of inside zone blocking by:
- Building muscle memory for proper inside zone blocking technique by repeating the motion, start to finish, at full speed over and over
- Maximizing lateral movement by placing an emphasis on opening with a wide step that puts players in good position to execute their block
- Developing explosion off the line by focusing on forcefully driving out off the weak side and shifting downfield when the strong side foot plants
- Properly timing the second step by getting the weak side foot down as fast as possible, immediately after the first step lands, each rep
Outside zone blocking drill
The outside zone blocking drill takes offensive linemen through the motions of blocking on a simulated “snap” of outside zone against a defender holding a blocking bag, with an emphasis on proper technique throughout the duration of the rep.
This drill involves two participants: one as the offensive lineman and the other as a defender holding a blocking bag. The linemen pop laterally out of a three-point stance and work to get the corner on the defender, sealing the edge and finishing high through their block.
Here’s how to complete the outside zone blocking drill:
- Pair offensive linemen into partners
- One partner lines up as offensive lineman, while the other holds a blocking bag and serves as a simulated defender
- Have the players stand face to face, with the defender’s inside foot lined up with the offensive lineman’s strong side foot (The foot of both players will be the same side as the playside)
- Instruct the offensive lineman to get down in a three-point stance while the defender holds the blocking bag in an athletic stance
- Upon a coach’s whistle or snap count, the offensive lineman opens their hip and takes a lateral first step with their strong side foot
- The offensive lineman takes their second step with the weak side foot, aiming for the outside hip of the defender
- Linemen should then run with the defender until they’re within reach to get leverage
- Coaching tip: Instill a mindset in your linemen that they’re getting on a track and running until the defender is close enough to make contact with (that can be three, four, five, or more steps)
- When they’re within reach to get leverage, linemen should strike the defender to engage their block using the following hand placement technique:
- Strong side hand placed on the defender’s outside shoulder
- Weak side hand thrown vertically under the defender’s playside number, pressing vertically
- Linemen should finish out their block by getting the corner, driving their legs and hands diagonally toward the weak side, and blocking until the coach’s whistle
Benefits of the Outside Zone Blocking Drill
This offensive line drill benefits players in multiple ways, including:
- Drilling proper outside zone blocking technique into muscle memory through detailed, focused repetitions
- Mastering the footwork required for outside zone blocking assignments through strict attention to detail taking a lateral first step with the strong side foot followed by a second step with the weak side foot toward the defender’s outside hip
- Working on hand placement accuracy by aiming for the defender’s outside shoulder with the strong side hand and throwing the weak side hand vertically under the defender’s strong side number each rep
- Teaching patience in timing the hands through emphasizing it as a key coaching point and players learning by failure when they reach too soon and get beat
Double-team and combination block drill
The double-team and combination block drill involves three adjacent offensive linemen communicating and working together to execute a combo blocking scheme. It forces offensive linemen to learn how to communicate blocking responsibilities pre-snap and work on the timing of their blocks, specifically with the linemen in the double-team-to-second-level blocking tandem.
In this drill, three offensive linemen face off against two defensive linemen and a linebacker. The strong side offensive lineman executes a one-on-one zone blocking assignment against the strong side defensive lineman, while the center and weak side offensive lineman initially double team the weak side defensive lineman. After reading the defense, one of the two breaks off to block the linebacker at the second-level.
Here’s how to complete the double-team and combination block drill:
- Have three offensive linemen line up on the line of scrimmage (any combination of three linemen can be used)
- Place three players not participating in the drill as defenders, two acting as defensive linemen and one acting as a linebacker
- Calls some combination of outside or inside zone left or right
- At the line, offensive linemen must communicate the following:
- Pre-snap responsibilities (which defender each lineman is responsible for blocking)
- Anticipated movement or shifts
- On the coach’s whistle or snap count, linemen take zone blocking steps to the strong side and use a proper aiming point for their initial assignment:
- Your lineman on the strong side takes the strong side defensive lineman one-on-one
- The center and weak side linemen double team the weak side defensive lineman
- Offensive linemen should then react to the defense with the strong side lineman maintaining their block against the strong side defensive lineman, while the center and weak side linemen execute the responsibilities they communicated pre-snap:
- One of the two takes over one-on-one against the weak side defensive lineman
- The other works up to the second level and blocks the linebacker
Benefits of the Double-Team and Combination Block Drill
This drill helps offensive linemen communicate and execute double teams and combination blocks in the following ways:
- Works on communication by forcing linemen to assign pre-snap responsibilities
- Builds timing in combination blocks in the transition from double team to one lineman taking over the lineman while the other breaks to the linebacker at the second level
- Practices proper zone blocking technique for the strong side lineman working the strong side defensive lineman one-on-one
Pulling Drill Circuit
The pulling drill circuit involves offensive linemen executing various pulling reads and assignments in a quick moving flow. One offensive lineman gets into their stance and, on their coach’s command, executes a pre-determined pull block (based on various gap scheme running plays) to the left. As the players clear the field, another offensive gets into their stance and begins the drill.
Here’s how to complete the pull circuit:
- Split offensive linemen into two groups
- One group gathers near the starting point for the offensive lineman
- The other goes to the opposite side of the line of scrimmage to serve as defenders with blocking bags
- Place a small cone in the following spots:
- Representing the center and the ball on the line of scrimmage
- Marking where the lineman places their inside foot, backed off the line so they aren’t cheated up on the ball
- Indicating where the defender should stand, and where the offensive lineman is pulling to
- Two offensive linemen complete the drill simultaneously while facing each other, one pulling left and the other pulling right
- A coach will either call out different reads, or reads will be predetermined
- On the coach’s whistle or snap count, the lineman pulling left executes their blocking
- The lineman pulling right begins their rep immediately upon the previous rep clears the area
- Continue in that flow until every player completes a rep
- Switch groups so defenders take the reps at offensive line and the offensive lineman go to defense
Benefits of the Pulling Drill Circuit
This offensive line drill helps develop and improve pull blocking skills in the following ways:
- Replicating and solidifying pulling technique by focusing on opening the hips, clearing the formation, and finding the block in space
- Learning various types of pull blocks and reads by repping multiple reads on different days or within the same circuit
- Getting all offensive linemen reps to both sides through the rapid pace of the drill circuit
Common mistakes to assess during run-blocking drills for offensive linemen
Each of the run-blocking drills we dove into work different motions and techniques. While there is nuance between drills, some common run-blocking mistakes to correct during reps in any drill include:
- Standing up out of the stance too early and losing leverage on contact.
- Overrunning the block angle on a pull and losing control
- Failing to communicate on a double team
- Stopping the feet at contact and not driving through the whistle
Tying these drills to actual play calls, as covered in the football offensive schemes breakdown, helps linemen contextualize their purpose.
Pass Protection Drills

Pass blocking drills work on various components of pass protection and all parts of the body.
Mirror and kick-slide drills
Long Mirror Drill
The long mirror drill involves an offensive lineman shuffling laterally in pass protection against a defender walking side-to-side between two cones. Two offensive linemen participate in the drill, with one serving as the offensive lineman and the other as the defender.
The long mirror drill develops hand positioning while mirroring defenders, as well as footwork and body control.
Here’s how to complete the long mirror drill step-by-step:
- Place two cones about 5-7 yards apart
- Have two linemen stand facing one another in between the two cones
- With the cones as the line of scrimmage, one player gets in a three-point stance as offensive lineman
- The other simulates a defensive lineman
- On the coach’s whistle, the offensive lineman pops out of of their stance, getting their hands up to protect their chest as the first move
- The defender begins to walk laterally and the offensive lineman shuffles to “mirror” them in pass protection
- You can use man-to-man defense in basketball as a coaching key for the motion if any of your players are current or former basketball players
- As the defender walks side-to-side at a casual pace, the offensive lineman focuses on a controlled shuffle in proper pass pro posture with their weight on their instep and carrying their hands high
- Emphasize attention to detail in maintaining control as the drill progresses laterally from cone to cone
- The drill ends on the coach’s whistle
Benefits of the Long Mirror Drill
This offensive line drill benefits players and teams in pass protection by:
- Developing proper posture through a slow and controlled pace
- Strengthening change of direction by shuffling laterally, in a wide and athletic stance, back and forth
- Building short area quickness by emphasizing hands up as the first movement
- Working hand carriage by keeping the hands high throughout the drill
Mirror Drill
The mirror drill enhances lateral movement in pass protection, and involves an offensive lineman battling a pass rusher at the line of scrimmage within a space confined by two cones.
Two players face each other at the line of scrimmage in between two cones, with one as the offensive lineman and one as a pass rusher. On a coach’s whistle, the defender erratically moves to simulate a pass rush while the offensive lineman shuffles side-to-side in proper pass protection posture.
Here’s how to complete the mirror drill step by step:
- Place two cones 3-5 yards apart
- Place two linemen on opposite sides of the line of scrimmage in the space between the cones
- One lineman takes offensive lineman while the other simulates a pass rusher on defense
- Both players begin the drill in a two point stance, indicating it starts after the ball has been snapped
- On a coach’s whistle, the defender begins simulating a pass rusher by moving side-to-side in chaotic motions
- The offensive lineman shuffles side-to-side in pass protection against the defender, staying within the cones
- As the defender moves chaotically, the offensive lineman needs attention to detail in maintaining proper pass protection posture with:
- Hands up
- Chest high
- Wide base with a base in the knee
- While the defender can spin and simulate pass rush moves, the offensive lineman cannot cross their feet over and must maintain a lateral shuffle in their wide, athletic stance
- The offensive lineman should remain patient in pass protection and avoid lunging with the upper body, which is a common reaction when a lineman panics
- When a defender tries to bull rush, the offensive lineman should engage the rusher with their hands, lock them out, and jump their feet back to regain leverage and posture
- Continue the drill until the coach’s whistle
Benefits of the Mirror Drill
This offensive line drill benefits a player and team’s pass protection abilities in the following ways:
- Teaching proper body position and movement for offensive linemen in pass block situations by getting reps in a confined space against a live pass rusher
- Executing clean footwork and maintaining a shuffle, avoiding getting tripped up by crossing over feet
- Practicing patience by avoiding panic, not lunging with the upper body, and remaining poised
Kick Slide Drill
The kick slide drill focuses primarily on offensive tackles, and works on kick slides in pass protection. It involves an offensive lineman getting into a two-point stance, kicking back, and sliding to a set interception point.
Here’s how to complete the kick slide drill step-by-step:
- Have an offensive lineman get into a staggered two-point stance with their weight on the inside
- Instruct the offensive lineman to aim for an interception point with the defender of about 3 yards back from their initial stance
- On a coach’s whistle or snap count, the lineman picks up their outside foot and throws it as far back as possible to get their body moving
- Once the body is in motion, the lineman should settle down and work into their kick slide
- At the interception point, the offensive lineman should be ready for contact at the interception point
Benefits of the Kick Slide Drill:
This offensive line drill benefits pass protection for players and teams by:
- Developing a quick first step by emphasizing on throwing the foot back as far back as possible
- Building lateral quickness by sliding toward the set interception point
- Solidifying proper technique into muscle memory through focused repetitions and attention to detail
Pass sets, double team, and stunt drills
Continuous pass set drill
The continuous pass set drill involves an offensive lineman blocking a rapid sequence of pass rushers with blocking shields, maintaining proper posture and delivering powerful, effective punches. After blocking each defender, the offensive lineman resets their positioning and keeps their feet moving, preparing for the next punch.
Here’s how to complete the continuous pass set drill step-by-step:
- Have one player go as the offensive lineman in the drill, while three to four others act as defenders with blocking shields
- Instruct the offensive lineman to get into a proper three-point stance
- On a coach’s whistle or snap count, the offensive lineman pops into good pass set posture and punches the first defender (who also moves on the coach’s command)
- The offensive lineman reloads and keeps their feet buzzing as the next defender approaches
- As the second defender rushes, the offensive lineman delivers a second punch and reloads once again
- In between punches, the offensive lineman focus on staying light on their toes and ready for any move the next defender makes
- That repetition continues until the offensive lineman delivers all four punches, when the drill concludes
Benefits of the Continuous Pass Set Drill
This offensive line benefits players and teams in pass blocking the following ways:
- Stressing pass protection technique into muscle memory through blocking multiple pass rushers in rapid sequence, making sure technique remains clean in dicey situations
- Providing one long, continuous set instead of just throwing four separate punches while standing their ground
- Working on proper footwork in an elongated pass set that includes multiple punches to multiple defenders
- Simulating the pass rush from multiple levels by sending defenders in a vertical line from downfield toward the blocker, as if the first defender is the defensive lineman and the second defender is the linebacker
- Developing short, quick, and snappy punches by ensuring offensive linemen aren’t winding up their hands in between defenders
Double team pass protection drill
The double team pass protection drill involves two offensive linemen, starting in a position after their first step, double team blocking a pass rusher. Offensive linemen start with their hips and feet touching, in position to execute the double team block. On the coach’s whistle, they work the defender back keeping their shoulders and hips connected.
Here’s how to complete the double team pass protection drill step-by-step:
- Position two offensive linemen foot to foot and hip to hip, as is if they already took their first step on the block
- Line a defender up sideways with one shoulder between both offensive linemen, simulating a defensive lineman trying to “get skinny” and beat the double team
- On the coach’s whistle, both offensive linemen stick their hips, extend their arms, and work their feet to get upfield movement on the double team block
- As the defender fights, turns, and wiggles, the offensive linemen must work to stay hip to and shoulder to shoulder while generating the upward lift and backward movement needed
Benefits of the Double Team Pass Protection Drill
This offensive line prepares players and teams for pass protection by:
- Hyper focusing on the technique by starting the drill after the first step, with hips and feet already touching
- Working on form by fighting to keep the hips and shoulders together while generating leverage and moving the defender
- Building teamwork by working together to develop timing and rhythm in double-team blocks
Two man stunt drill
The two man stunt drill involves an offensive guard and offensive tackle working together to block a two man stunt in pass protection. Two offensive linemen work to communicate a switch when their hips touch, handling the stunt while maintaining great pass protection fundamentals. It teaches the OG and OT to stunt block in pass protection
Here’s how to complete the two-man stunt drill step-by-step:
- Place an offensive guard (OG) and offensive tackle (OT) in a normal stance and alignment
- On the other side of the line of scrimmage (LOS) align a defensive lineman and a linebacker in any front
- A coach tells the defensive player what stunt, slant, or blitz to execute unbeknownst to the offensive linemen
- On the coach’s whistle or snap count, both offensive linemen take an initial kick slide
- The defensive players begin their rush and execute their assigned stunt
- Both offensive linemen engage the defensive player in their area until the switch call when they’re hip-to-hip, the defensive player cross has happened, and they can exchange
- Throughout the rep, offensive linemen should focus on sound pass protection fundamentals including
- A strong punch
- Finishing with a lock out
- Sticking the hips in the lowest seated position to not get driven back
- The drill is completed after the exchange or at the coach’s whistle
Benefits of the Two-Man Stunt Drill:
This offensive line drill benefits players and teams in pass blocking in the following ways:
- Developing a strong kick step through emphasis on gaining depth so linemen can see what’s happening in front of them
- Establishing disciplined form by working both linemen to stay square until the stunt declares itself, so neither turns their shoulder to chase the nearest defender and opens the gate for the second stunt man to come through
- Forming communication by practicing and locking into the switch call
- Reinforcing proper pass protection fundamentals by emphasizing a strong punch, finishing, and sticking the hips in the lowest seated position
Live Team Line Drills And Progressions
Isolated drill work truly pays off when combined with the rest of the defense for live team drills. Moving linemen into game-speed periods without sacrificing technique takes a deliberate progression.
Individual to group to team progression model
Coaches typically progress linemen through three stages across each practice: individual technique work, small-group drills against a look, and full-team periods run at game speed.
| Progression Stage | Period Length | Focus | Example Drill |
| Individual | 10-15 minutes | Stance, hands, footwork | Fit and finish |
| Group | 10 minutes | Combination blocks vs. a defender | Double-team read |
| Team | 15-20 minutes | Live scheme install at tempo | Scout-team scrimmage look |
Scout-team look reps and situational periods, including two-minute and red zone line work, round out the week.
Coaching Points For Every Offensive Lineman
Position-specific technique matters, but a handful of key coaching points apply to every lineman on the line
Top 5 cues coaches should repeat every practice:
- Pad level: stay lower than the defender being blocked
- Eye discipline: eyes up, reading the target before contact
- Communication: call out stunts and blitzes before the snap
- Leverage: win with hip and knee bend
- Finish: maintain contact through the whistle on every rep
Conclusion About Football Offensive Line Drills
This resource provides a solid base of offensive line drills for football coaches to work into their practices. The line is the foundation of the offense, so it makes sense to spend the time and effort getting linemen as many reps of essential technique as possible.
By completing the drills within this resource, your offensive linemen will begin to develop and hone a well-rounded skillset. Those abilities are likely to translate into results on the field with the hard work and the right pieces around the line.
For more football resources, visit our blog and football coach’s toolbox.
FAQs About Football Offensive Line Drills
What are the best exercises for the offensive line?
The most effective offensive line drills combine stance work, hand placement, and combination blocking: the stance-to-start drill, the tennis ball hand-placement drill, and the fit-and-finish drill. Squats and sled pushes support these in the weight room but don’t replace them. Technique reps against a defender build the skills that show up on Friday night.
Why is the Oklahoma drill banned?
The Oklahoma drill pits a blocker and a ball carrier against a single defender in a confined space at full speed, producing a high rate of head and neck contact. Many youth and high school leagues have restricted or banned it due to concussion risk. Coaches now favor controlled fit-and-finish drills that teach the same technique with less collision risk.
What is the hardest position on the offensive line?
Left tackle is generally considered the hardest position, since that lineman usually faces the opposing team’s best pass rusher one-on-one with little help. Center is a close second, requiring a clean snap under pressure. Difficulty ultimately depends on scheme, since zone blocking asks something different of each position than a power scheme does.
How do offensive linemen train?
Offensive linemen train through a mix of strength work, agility drills, and technique-specific reps like stance, hand placement, and pass-set drills. Strength training builds the power to control a block, while footwork drills build the speed to reach a block angle before a defender closes it. Film study rounds out the training, since line calls must be instant and correct.
Share This Article
Related Articles



Free Playbook Template
Our downloadable template offers a sleek, detailed design with space for positional roles, play descriptions, and any play notes that you want to include.